Getting ready for Christmas

November 27, 2008

I know it's Thanksgiving, but let's face it. Christmas is the holiday we look forward to most. We took advantage of the warmer days to put up lights outside and clean up. We got these little lighted trees last year. At first, I thought they were cheesy, but now I like them. It's like a little path for dwarfs.


We bought a fake tree to put on our porch, so that it's visible from the outside. Our enclosed porch blocks the view of our real tree inside the house, so we decided to do up the outside instead. I'll put out some cookies and milk on the table.


I wrapped some faux presents in brown paper with various bows to put under that tree which was a lot of fun. I used various leftover ribbon and bows that I saved through the years (yes, I'm saver). The white yarn pom pom was from Mrs. Chickadee last year. I loved it so much that I couldn't bare to throw it out.


Inside the house, I'm slowly putting up garland. I really stink at this. I have no clue what I'm doing or if it looks good.

In other news, I touched up the ceiling paint in the now spare bedroom and office. When we moved in, we painted in a hurry and the poor results show. There were tons of paint blotches all along the corner where the ceiling and walls meet. I bought the same brand of ceiling paint and crossed my fingers that it would dry to match. I edged around both rooms and the results look much better now. That's one task that I can put to bed.

The "new" Guest Room

November 17, 2008

After yesterday's move, we went back to our old place to tidy up. I had big plans to redecorate this room by giving it a modern face-lift, but after putting things back and the exhaustion kicked in, I'm quite happy with the room. It has a "bed and breakfast" feel which is really calming.


I'm going to sew a bed cover and drapes, so the room isn't so mismatched. Surprisingly, the stain of the bed frame matches our bedroom furniture pretty well. There is so much more space in the room now for movement.

We've Moved!!!

November 16, 2008

...our bedroom.

Keith and I thought it would be really practical to send each other loves notes via paint. Here he is responding to my message on the same wall from 2 years ago.


So we moved from the medium sized bedroom into what was my office/guest bedroom, which is the largest bedroom in the house. Although this is the largest room, we used the medium bedroom as a master bedroom because of our bedroom furniture. This room was awkward in wall space and we wanted to keep the bedroom set together.


Finally, we decided enough was enough. Why are we not using the largest room in the house? Why are we living around our bedroom furniture? We split the bedroom set up: Bed and tall dresser in this room. Armoire and night stand in the other room. This way, it looks as though both rooms are fully furnished, but they really one set.


Before Pic: I went to Home Depot last night and randomly chose a color. It's "Light French Gray" by Behr. It's a blue toned gray color. At first, it looked a bit like Periwinkle which had me worried. After it dried, you could see the gray blue.


Retail is down, so I got this mirror for $7 (originally $26)


We brought the love seat up to create a little sitting nook in the bay area of the room.


Now, to clean the other room...

Block Party Banner

November 6, 2008

*I just noticed a post that was in my drafts folder that never got posted. Originally dated for Aug. 28th, 2008*

Our block is having (had) their annual block party and I volunteered to make a banner to hang above the street. At first, the idea started out as an old bed sheet and acrylic paint. Then, I was curious to see if I could sew it. We can use it over and over again each year.

I embellished it with a butterfly and flower.


The letters "E" and anything with a center like "R" or "A" were the more difficult letters to sew because I had to stop at every single corner which got annoying after a while.


The leaf and bird is my favorite part of this.


Once it was up above the street, it seemed so short, but it was actually quite long. Next year, I will have to sew a back to it, so you can see it from both sides.

To-Do-List update

November 5, 2008

I love seeing our to-do list shrink!!!

FALL ‘08

Things to Do Soon
  • Put up Christmas lights around outside of house.
  • Install gutter guards.
  • Buy new dryer

Living Room

  • Crown molding.
  • Tape South window.
WINTER '08-'09
Kitchen
  • Install cabinets on refrigerator side.
  • Install dishwasher.
  • Install cabinets on sink side.
  • Cut existing counter top.
  • Do floor tiles.
  • Give kitchen second coat of paint.

Water Closet

  • Spackle, sand and paint. (Working on spackle now.)
  • Staple molding
  • Toilet - Getting an estimate for installation soon.
  • Sink, Shower?
  • Do floor tiles
  • Paint and Install door (in attic)
  • Replace light and cover.
SPRING ‘09
Yard
  • Mulch heavily in weedy areas.
  • Lay pavers down under BBQ grill.

Repainting Along the Staircase

November 2, 2008

To match the living room, I finally repainted along the staircase. We painted it when we first moved into the house and did a rather hasty job. We really scuffed it up too when we moved the furniture in, so I have always meant to repaint it.


I had to remove the railing and switch covers again.


I had to give it almost 3 coats of paint to give it a clean finish.


Now, I'm selecting photos to hang on the walls. We want to hang photos from our travels, but it seems like "Keith and Anita" overkill.


I also touched up the bathroom molding.

Chalkboards

November 1, 2008

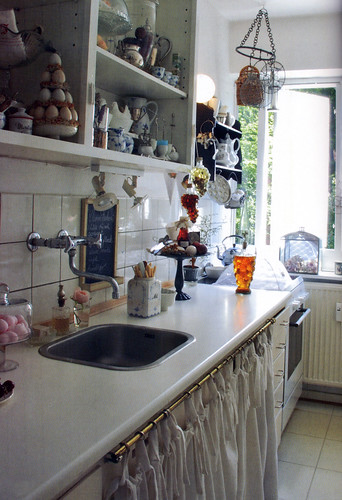
My first memory of a chalkboard was in Anne of Green Gables when "Anne with an E" breaks her chalkboard over Gilbert Blythe's head! I have always had a fondness for chalkboards and since we started the kitchen renovation, I have on the look out for a antique chalkboard or vintage frame that I can paint and turn into a chalkboard

My neighbor was selling a mirror that she took from an old medicine cabinet, so I started looking for chalkboard sheets to turn the mirror into a chalkboard. I like it because it has the original hardware on it which makes it interesting.

Peel and Stick Chalkboard from Olive Kids


Coincidently, I'm not the only one with this idea. Etsy seller Artebella sold this antique chalkboard with hooks and doorknob. It's so cool! We have a 5-panel door in the kitchen where I plan on hanging the chalkboard anyway, so maybe I should just stick the chalkboard sheet into the door?


I started seeing them all over the place. On Kitchen Designer, I'd see these neat chalkboards tucked into the back splash of kitchens, but where do *I* find one!?!

(image from Vakre Hjem)

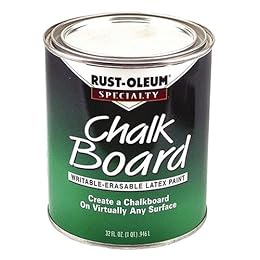
Then I read that Rustoleum sells chalkboard paint! I smell Project! I think this is so cool. You could paint a whole wall of a child's play room or kitchen wall.

$14.93 from Target


Here's an interesting article on How to Paint a Chalkboard.

I love this idea from Real Simple of painting an image that kids can draw on.


What do you think? A mural? A frame? A door?

Installing Window Casing

Part I: Window Trim

We finally installed the casing around the window today! Casing was on sale too, so we came in under budget. The left, right and top pieces are 2 1/2" wide and the bottom piece is 3 1/2" wide.


Materials:
  • Miter Saw (or table top saw)
  • Window/Door Casing - $19
  • Finishing nails
  • Spackle, caulk, primer, paint
The yellow box is a miter box. It has slots in it so you can saw a piece of molding or casing at a straight edge or at 45 degrees where the corners meet.

If you have a table top saw, it's even better because you can gauge the angle for yourself and get the corners to meet flush like when our friend Andy did our dining room. This is necessary in many cases since walls and frames aren't exactly straight or even, so you may never have a perfect 45 degree angle. This is almost always the case with installing crown molding because you may have all sorts of angles and/or an uneven ceiling.

Here's the first piece going up. Nail the casing down into the window frame.


The rest of it.


Hammer the nails a little deeper into the casing, also known as "dimpling". Then fill the dimple with spackle. Allow to dry, sand, prime, paint and then caulk the seams. I'll work on that tomorrow.


I also patched up the box around the exhaust duct for the range hood.

Cleaning the Gutters

One word - Nasty. I'm faking the smile here.


To clean your gutters: Securely put a ladder up to the gutter. Take all safety precautions. With gloves, grab all the leaves and put them in a plastic bag. When the bag is full, tie it up and toss it.

This is definitely my least favorite task. I wouldn't recommend you doing this if you don't have to. Hire a handyman and install some gutter guards. If you don't have gutter guards, the leaves will clog up your drain pipe and water will just sit in your gutters until you manually clean it out as I had to do today.


As you can see in the above picture, I was pretty high up there. It was a little disconcerting even for someone who is not afraid of heights. This task ranks up there with cleaning a toilet at a fraternity house after a super bowl party. It was wet, dirty and buggy. I should get Wife Of the Year award for this.

Happy Halloween

Painting your Hive

October 24, 2008

Hello Hive! It's been a long time. I hope everyone is doing well. I've been a busy bee renovating our hive, being a worker bee and buzzing about the garden this summer. Like many of you who are moving into new hives yourselves, I thought I would revisit a question that I get often. One of the most exciting things about moving in together or getting a new place is making it your own. One of the most inexpensive ways to do that is by painting.

Materials:
Painter's Tape ($5), 3 roller covers ($10), roller extension pole ($12), primer ($16+), ceiling paint ($18+), synthetic bristle paint brushes ($5+) , plastic drop cloth ($1.79), paint can key (.89c), Paint ($25-55/gallon), paint can lids with spout ($3), wooden stirrers (free at the store), ladder, shop vac ($40), misc dry rags, paper towels, trays or cardboard to lay tools on.
"I LOVE YOU" on the wall - PRICELESS


For those of you who have moved into new construction, it’s always a little easier to work with. If you’re like us who are just starting out (poor), bought a lovely (old) home with lots of character (things to patch up), then it may need a little finessing. Here are some things that I’ve learned along the way.
  1. Preparation – Vacuum any dust and loose dirt particles. Unscrew wall outlet and switch plates. With a damp rag, wipe dust and grim off window ledges, trim and above windows. In very old homes, Mrs. Onion found that she had to wash her walls to clean the dirt and grease that accumulated over the years.
  2. Fill in any holes or cracks with spackle or joint compound. For a small job, there is a lighter weight spackle that comes in a tube or small container. Using a spackle knife, apply a glob into the hole and scrape across the hole while applying some pressure. The idea is you want to fill the hole and then scrape off the excess. For a demonstration, watch this video.
  3. Allow to dry over night. Then using a sanding block or sandpaper, lightly sand the area so it’s flush to the wall. Don’t use an electric sander or sand too aggressively. Vacuum with a shop vac or wipe up the dust from sanding the spackle. Lay a drop cloth down.
  4. Paint the spackled spot with primer. Most people say you’re “Priming your wall.” This is an important step that cannot be skipped because spackle will absorb paint differently and will swell leaving you a bump on the wall which is the opposite of what you wanted.
  5. Prime your walls – Most of the time, you have to do this especially if the previous wall color was an oil based paint or a very dark color. This clears the canvas for you and lets your new paint adhere to the wall and show off it’s true colors.
  6. Paint your ceiling - If you plan on painting the ceiling, you should do so before painting the walls. Give it 2 even coats. Allow it to fully dry before deciding whether it needs a 3rd coat. Some ceilings and some ceiling paints will absorb or adhere differently.
  7. Tape - Using 2" painter's tape, tape around the ceiling, moldings, and anything else you're avoiding. If you have a steady hand, you can "edge" freehand, but it's can't hurt to tape. Especially around the ceiling because your eye immediately draws to the ceiling. Clean lines are greatly appreciated here.
  8. Edge - With a 2 1/2" angled brush, paint (called "edging") along all the corners, around windows, doors, molding, floors and around below the ceiling. Edge at least 3" in because this is the area that your roller won't reach.
  9. Then the easy part! Paint! Thoroughly stir your paint first. Pour some paint into a paint tray lined with a disposal liner. Roll your roller into it a few times coating it evenly. Then roll the paint onto the walls. Depending on the color and conditions of your existing wall, you may need a second coat. Make sure you have plenty of light while you paint.
  10. Clean up - Dispose of paint cans properly. Call your local sanitation dept and ask them to pick them up. They should not go out in regular trash! Wash paint brushes in warm water immediately! Allow to dry flat. Roller covers can be reused if you take the time to wash them. Cover unused paint cans and hammer it down.
  11. Order a pizza and enjoy your new walls!
Before and After: Paint color is "Rain Washed" by Behr - Home Depot


Tips and FAQ -
  • My favorite references are This Old House because they show you images of all the tools you need. They are also very thorough. For a simplified version, ehow is a nice guide. HGTV is okay. They're a little more difficult to search through and their projects are often too big for us or don't apply.
  • When I start a new project that I've never done before, I ask all my friends, family and coworkers what they think. Often times, they will tell you something that you wouldn't know until you tried it and can save you a great deal of time and effort. Also, I read several online tutorials and COMPARE what they've said. Then I come to my own conclusion and way I plan on proceeding.
  • Give yourself enough preparation time especially to spackle. If you don't get it all done, don't fret or get frustrated. Don't feel pressured. The prep can be a pain in the stinger, so give yourself ample time. Mr. Snow Pea and I will alternate in processes. ie. I'll vacuum and tape. He'll paint the ceiling. I'll paint the walls. He'll order the pizza and I'll...you get the idea.
  • Pay for the "higher end" rollers and brushes. If you can afford to, pay for the higher end paints. They go on so much smoother and have more complex colors.
  • Avoid bumping the ceiling with colored paint which is why you do Step 8. Wipe immediately with a dry rag. Touch it up with a small brush. Ceiling paint is a different consistency, so often you can see the touch up marks. Don't wait.
  • To easily dispose of a roller cover, put a plastic bag around it and then pull. Discard the whole thing.
  • Saran or plastic wrap is a quick and easy way to cover door knobs.
  • Down the road, if you put a hole in the wall, you can go back to Step 2 through 4.
  • I DO NOT recommend this paint can spout. The one I like is no longer available. Looks similar to this, but with an aluminum lid that you hammer into the can. This is useful if you know you can't use the entire can of paint.
  • I've tagged and dated on my paint cans for reference.
  • Borrow as much as you can. If you're never going to paint again, borrow your rollers, ladder and extension poles.
  • If you own a house, it's not a bad idea to purchase your very own shop vac. It's a very useful thing. Spackle dust will ruin your regular vacuum filter.
Let's hear some of your home improvement stories. What advice would you give newbees? Have you painted? If you can't, how have you personalized your new hive?

Patty Melt

October 23, 2008


Ingredients:
  • Ground Beef/Burger Patties
  • 2 Onions
  • American cheese
  • Butter
  • Bread
  1. Cook the burger patties in a skillet.
  2. Caramelize the onions until they are golden brown.
  3. In the mean time, lightly butter your bread.
  4. Make a sandwich by placing your burger on the first slice of bread. Top with onions and cheese.
  5. Then place the other piece of bread on top and grill it on the skillet like a grilled cheese sandwich.
These are soooo yummy!

Update on To-Do List

October 21, 2008

FALL ‘08

Things to Do Soon

  • Put up Christmas lights around outside of house.
  • Clean gutters.
  • Install gutter guards.
  • Clean out attic
  • Clean out basement
  • Clean out LR closet
  • Change out light in my office.
  • Change light cover in upstairs hallway (out dated)-$30, get high efficiency bulb $15.
  • Repaint hallway and along stair to match living room (extra paint leftover)
  • Re-stain deck (before/after winter?)
  • Move patio furniture into basement for storage.
  • Buy new dryer (ours is on it’s way out)
  • Paint - columns, door step, shed, molding.

Living Room

  • Staple molding around room and get corner molding.
  • Sew drapes
  • Tape South window (it’s sagging and drafty).
  • Replace lights with hi-eff blubs.

Yard

  • Patio with pavers under BBQ grill- (Spring ’09)
  • Mulch around house throughout fall.
  • Plant bulbs (Tulips and Peonies).
  • Prune back lilac bushes
  • Place weeds on curb to be picked up.
  • Continue staining deck.
  • Repot plants and bring inside for winter.
  • Prune shrubs.
  • Spray paint wicker furniture.
  • Cut back plants that are done for the season.
  • Plant new shrubs/flowers.
  • Move Japanese maple tree.

WINTER ‘08
Kitchen

  • Staple molding around window.
  • Staple molding around doors.
  • Install exhaust hood and above stove cabinet.
  • Put in recessed lighting covers.
  • Install cabinets on refrigerator side.
  • Install dishwasher.
  • Install cabinets on sink side.
  • Cut existing counter top.
  • Do floor tiles. (Thanksgiving '08)
  • Give kitchen second coat of paint.

½ Bathroom

  • Spackle, sand and paint. (Working on spackle now.)
  • Staple molding
  • Fix window (it’s stuck) One day, I lifted it without any effort!!!
  • Toilet - Getting an estimate for installation soon.
  • Sink, Shower
  • Do floor tiles - $60
  • Paint and Install door (in attic)
  • Replace light and cover.

Painting

October 19, 2008

Today, I painted...
  • The columns on the front porch.
  • Spray painted the wicker chair.
  • The shed.
  • The foot of the door.


It seems of little importance, but these were loose ends that I kept putting off. Our door step got banged up so much during the move in that it was all scuffed up and chipped. Since I had exterior paint for the shed in the same color I used it for the door step considering it would be perfect for such a high traffic area with extreme temperature changes.

Door Casing

October 18, 2008

Today, Keith put the molding back around the doorways. When Keith removed the casing back in April, he did so very carefully and marked each one with masking tape and a sharpie. That way, when he went to put them on, he would know what goes where. They are made of solid wood, so we didn't want to waste them and replace them.


Before:


After: What a difference!


He was even able to salvage the original nails and reused them.


Now, all it needs is some spackle, paint and caulking to make it look like new!

While he worked on this, I did a few other things myself...

Window Trim

October 16, 2008

There's nothing new to report. I painted the trim on the inside of the window in preparation to staple the casing molding around the window this weekend.


Before:


I checked out Home Depot and they have the casing for $1.39/linear feet. For the window, we need about 20 feet. It's about 3.5'x5.5'.

Backsplash Ideas

October 13, 2008

I love tile. I guess it's part of my DNA. I have always loved materials of all types and of all the things you can make with them. I've been putting a lot of thought into tiling behind the stove. I'd like to do something a little more artistic than the traditional tile patterns. Possibly something more mosaic like. In particular I love glass tile. Glass tile also takes 1/2 the amount of energy needed to make ceramic tiles which is better for the environment. It's even better if you use recycled glass tile.

To tile behind the stove is a little tricky because we're afraid it will look funny since our stove is stand-alone. I found one picture here with our stove layout which I found interesting - exposed duct and all!


In addition, I found a really good tutorial on how to tile a back splash and add a shelf which is something I'd really like since we lack storage space as is.


Here's an example of a clear glass tile back splash from HomeStar. I love how clean it looks with a tint of blue.


Here's an interesting video on tiling a back splash with glass tiles.

I'm also a huge fan of mosaics and I find that people don't it anymore. Here's a blog and list of mosaic artists. Mosaics are so beautiful.

Our neighbor told us about Mercer Castle where there is lots of tile eye candy to see, so we might take a trip out there just for fun and get inspired!

Deck Complete!

October 12, 2008

I woke up early this morning and finished up the deck. It looks amazing.


I'm so glad it's done and over with!

LinkedIn

Related Posts with Thumbnails