Touching up

June 10, 2011

Since I was painting I thought I might as well touch up the kitchen door and trim.


I didn't take a before photo but the trim was yellowing and dirty.


I think it's much better now. I need to touch up the walls now. I want things looking spiffy for the baby shower.

New Rug

December 30, 2010

Lovin' this new rug that I scored at Home Goods! I love it. It's thick and the flowers are beautiful and vibrant.

My boy Guinness loves new rugs.

I love it warms up the kitchen and goes with my vintage seeds illustrations.

Here it is with my new roman blinds as well. I love the way the blinds look.

These flowers remind me of the beautiful zinnias that are in the garden.


Guinness approves.

Kitchen Blinds III

December 27, 2010

Yes, we're revisiting the kitchen window once again. The first two iterations just weren't working for me. I love the look of roman blinds, but the one I sewed was blocking the natural light. Here's the new one I ordered from Overstock.

Because of the trim on the inside of the window, we couldn't mount the brackets on the inside of each side as we usually do. Instead, the hubs mounted them on the outside face of the trim. At first, it looked awful. The blind is shorter than the window since it was meant to sit on the inside of the trim, so that's exactly what it looked like - a short blind hanging off from a big window.


Then I had an idea! I asked the hubs to hang the curtain rod back up slipping the rod between the valence and the shade.


So now the rod looks like an accessory to the blinds and the roman blinds don't look like they are floating anymore.


These are the same blinds I ordered for the dining room but in a different dimension.


My ghettofabulous counter

February 7, 2010

Our stove is stand alone with no counters on either side because there isn't much room to begin with. I really felt like I needed something though; a place to put my spoons and a bowl or some spices while I cook. I have bugging the hubbs to build me something and look what he whipped up.


He's not finished yet but this is the basic concept. I googled photos and this is what they do around stoves anyway. You just need to add some more wood that matches the cabinetry. Keith used the extra baseboard/toekick leftover from the cabinets to build a frame that matched the cabinetry. Then he cut a piece of counter top that used to be in the backroom (some day half bathroom) for the top.


Voila! It's sturdy and now there is a place for my stuff!

Cabinetry Crown Molding

January 21, 2010

Yay! The crown molding is finally up! We bought 2 pieces when it was on clearance ($60 yikes!) and it's been stowed away until now. We were so afraid to mess up the cuts so it took us a while before we had the guts to do it.


Molding over the hood. The wall still needs touching up where we sanded it again.

This picture is supposed to be of the toe kick under the cabinets (behind Basil). He thought I had a treat in my hand and kept sitting in front of me (and the camera). He's such a ham! The white dust on his chinny chin chin is from the sanding. Poor little guy.
Also, the hubs fixed up the phone jack and installed a new phone. We don't have a house phone, but eventually we might need it.
Next: .... Dare I say it? We're almost done with kitchen. We just need to get new countertops. They are on hold right now. We're searching for wholesalers and other specials. Our priority is getting the half bathroom installed, so we will have to turn on our energies on that next.

Potted Mug

January 16, 2010

Over the weekend, I hit up Marshall's and Home Goods for some cheap, sweet finds for the dining room or kitchen. I picked up this monogram mug for $1.99.


It has a wide and heavy base which made it PERFECT for a little houseplant on the window ledge.


Using a large plastic cup, trim until it's level with the rim of the mug. Poke holes in the bottom of the plastic cup for drainage and air circulation. Why do I do this? In the past, I just found that this was much easier to maintain instead of putting the soil & plant directly into the mug or ceramic planter.


Then fill the cup with potting soil. I keep some handy near the house.


I pulled these spider plant babies off a larger spider plant. Just tuck them into the soil and water it in. Spider plants are really easy to maintain house or office plants. They are very forgiving.


I did the same with this soup tureen from Crate n Barrel. I love its rounded shape which goes great with these succulents because they will multiply in a big mound. In the winter they look very dark, but once summer comes they will plump up and look bright green again. These require almost no water.


I couldn't help myself and I made just one more with my little bowl for melted butter.

Baseboard trim

January 13, 2010

I have the best husband in the whole world! Besides finishing the ceiling, installing the lights and chandelier the hubs caulked all the trim in the kitchen and even installed the baseboard trim.


We did salvage the old trim and planned on reusing it. After some thought, we decided to update it and buy new baseboard that was 6" instead of 4. There's just so much wear and tear on a kitchen and I think the taller baseboard will be easier to clean too.

Shucha Shiny Shtove

January 8, 2010

We got our new stove! Yay! Let the cooking begin!


ooooooooohhhh aaaahhhhhhhh

I can't believe what a face lift it gives to the kitchen! That old stove was really a drag like an unwanted prom date. The new stove is so much cooler to hang out with. Looking back (if we had the funds), we feel like we should have gotten the stove sooner because it's been such a transformation!

More To-Do:
  • Paint and install baseboard trim around kitchen floor.
  • Fill in nail holes with spackle on door trim. The repaint.
  • Order a new counter top. (gulp)
  • DIY wall spice rack.
  • DIY wall shelves for displaying white china and cookbooks.
  • Install cabinetry toe kick and crown molding.
  • DIY white, linen curtain.
  • Shelf in mid section of window for plants (*This is going to be a project*).
  • Buy White ceramic pots for house plants.
  • DIY cork board for inside cabinet.
  • DIY chalk board for messages.

Rug Runner

January 6, 2010

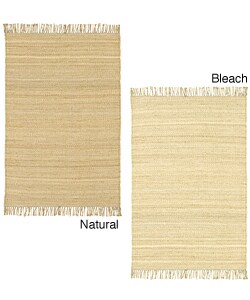
For the kitchen. 2'-6"x7'-6" It's the perfect length for the sink area of our kitchen. I wanted something with a lot more pop, but in the mean time I thought I could not pass this up since it's tricky to find something that is the right combo of size and style. I haven't found my "style" yet for the kitchen, so I wanted to avoid investing in something that I would later regret. We still have shelving and artwork to hang, so until then this will do.


from Overstock here.

New Stove!

January 3, 2010

Finally, after weeks of saving we purchased a new stove for the kitchen. A new stove was not a priority since there is nothing wrong with our old one. It's just outdated and did not match the rest of the kitchen. Home Depot had a sale, so we ordered it right a way. It's coming on Wednesday!

GE 30" Freestanding Gas Range here.


Of course I was coveting this one forever but there's just no pay off on a stove. It's just a sunk cost. It's stainless steel and cast iron, so it costs more and has more features, but it also uses more BTUs. In other words, it's going to cost you more to cook instant mac-n-cheese on this versus one of the less costly stoves. It also boils water faster. However, a convection oven would really be useful since I do love to cook and bake.


Maybe in our next home :)

Ciao

April 6, 2009

Sorry there won't be any updates for the next two weeks, but...we're headed to Italy! When I come back, I'll have new things to decorate the kitchen and spices to cook with! For now, I leave you with these. We still need to put the molding back along the floor, install the toe kick and molding that matches the cabinets, and install some exposed shelving.

Before:


After:


Before:


After:


So far I'm lovin' my new kitchen! I have been keeping it super clean to maintain it's "new car smell". It's really come along way.

Tadaa!

March 30, 2009

On Friday, we had a plumber install the dishwasher. This was something we admitted we could not do on our own and after watching the plumber at work, we're glad we didn't try to attempt it. After we put the 2 cabinets in and put the sink and counter top back on, it looked like a kitchen again!


I have more details about the dishwasher installation, but for now I leave you with this picture.

Moving an Electrical Outlet

March 27, 2009

We had to move one of our electrical outlets down 2' and under the counter in order to plug in the dishwasher. We read up on it here and it was super easy. The wire came from the basement, so we had enough slack to move the entire assembly down. The only we had to fix up was cosmetic.

Top: old outlet and hole. Bottom: New hole


Fill the hole in with a new piece of dry wall. Spackle, sand, prime and paint.


Next: Installing a new dishwasher (where there isn't an existing one)

Project: Moving a Supply Register

Before installing the cement backer board, we actually made a pit stop to move the supply register that was in the middle of our kitchen floor. It was in the worst possible place. Every time we walked pass the register we would get our socks caught to it. There was nothin' like stunting your toe on hard cold metal either.


Peel away the linoleum around it. Using a little pry bar, pry the edges of the duct fitting up and pry up the nails. Wiggle it to loosen it. It was a real blow to my ego since I'm in HVAC, but have never installed any ductwork personally.


First, you should locate the duct in the basement if you have access and make sure it's okay to move it! We decided to move the supply register 2 bays over, which would put it along the wall next to the fridge. This pretty much went against everything I learned in school and work, but it is what it is. It was really interesting. Remove the duct hanger and take it back to the bend. Reattach a new insulated duct. $25/25 feet - Lowe's


Of course, no project would complete without some immature playing around the hole that is now in our floor. From the basement, looking at me in the kitchen.


From the kitchen, looking into the basement!


When you decide where it's going to go, trace a 4x12 opening which is the size of our register. Drill a large hole at all 4 corners of the rectangle to use as your starting point. With a reciprocating saw, start at one corner and cut along the line.


Put the fitting into the new opening, hammer the edges over the floor and nail down.


Cork the original opening with some scrap wood.


Keith used the rectangle he cut out for the new opening to fill in the old opening. He's so schmart! Screw down until flush.


Tile around the opening leaving the best for last. Take some measurements, measure the opening, mark where you're going to cut.


Using a wet saw, cut the tile to size. I just had to laugh at Keith's trash bag coat.


Perfection!


Then continue to tile and grout.

When the grout is dry and the tile has been buffed, just pop the supply register in (requires no installation). $17 solid Oak - Lowe's


What a beautiful piece of work!

Project: Tile V

March 23, 2009

Today, we finished up with some grout. Get your materials ready:
  • Clean big sponge.
  • Grout float.
  • Clean bucket of water.


Grout and water


Using the grout float, schmear the grout into the crevices between the tiles over a small area (the length of your arm all around). Smooth it out and use as little as you can. Then using a large sponge and clean water, wipe the tiles clean and smooth out the crevice.


Work from the inside out and voila! It looks dull right now because of the grout residue. In 24 hours, we will buff it clean using a dry rag.


Oh what fun! Then we get to move everything back into the kitchen.

LinkedIn

Related Posts with Thumbnails